Our Top 5 Driveway Edgings

So, you’ve decided on the perfect driveway for the front of your house. You’ve picked the material you’re going to use for the drive. You’ve got the plans for what will go where, and everything fits perfectly. Before finalising the plan, it might be worth thinking about the finishing touches.

Where the driveway meets the flower bed or lawn, a divide can make a perfect edition to the overall look. There are several options, some purely cosmetic, some serve to provide better drainage, and some keep everything where it should be.
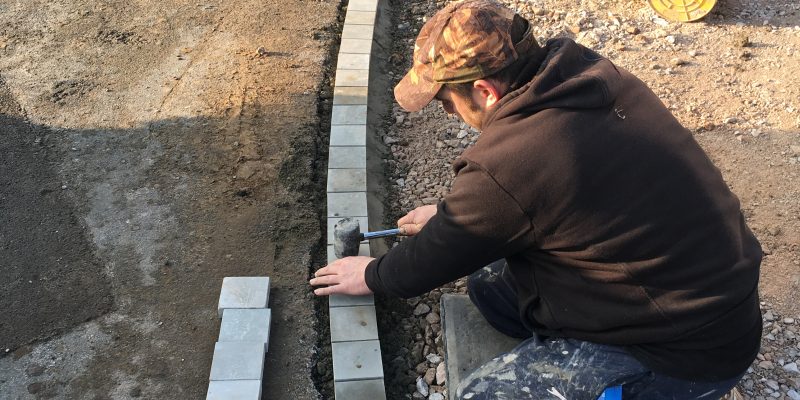
Concrete Paving Set

Whether you’ve used block paving or not as the material for your drive, a concrete paving set works great as a surround or divide. Using similar bricks to a block paved drive, they’re perfect for creating a finished edge. The options in colour, size, and style make them a popular choice and they won’t cost anything near paving a whole drive.

Natural Rocks

Natural rocks provide an awesome visual effect. With their variations in size and shape, there are usually no end of rocks to choose from to suit your vision perfectly right down to the last rock. Using a concrete base, you can set the rocks around the drive however you please. If space is tight on the drive, just be careful when parking as the underside of your car probably won’t get along with them.

Log Roll

This cheap but effective finish comes in various effects, styles and lengths. You can concrete them in as a permanent feature or simply embed them in the lawn or soil around the edges. It’s worth noting that unless properly treated and looked after, they can deteriorate and if they were set in the concrete, will be more difficult to replace.

Wooden Sleepers

Another wooden finish, much more durable than log roll are wooden sleepers. You can stack them, or embed them vertically to produce a neat and tidy divide. They won’t take as much maintenance to hold their quality as the log roll but will definitely need coats of protection from time to time.

Purpose Made Edging

If you look for long enough, you’d never stop finding varieties of purpose made edging. From kerb to cove, rubber to rock, there are many different shapes, sizes materials or colours. As they’re purpose built for the job at hand, some types are easy to install even as an after-thought.

For more information about installing edgings as part of your project, feel free to contact us by clicking here.

How to seal a block paved driveway

Sealing your block paving driveway every 3 to 5 years helps with much more than just protecting the surface. A properly sealed driveway will keep weeds at bay, help protect from UV damage and keep the driveway looking its best for years to come.

With just a few tools and materials at your disposal, sealing your block paving driveway can be undertaken as a bit of home DIY. To do this properly you’ll need just 3 days over the course of 2 weeks, weather dependent (Sealing your Block Paving Driveway in the North West may take longer).

Jet Wash

The first of these tools you’ll need is a jet wash. It’s important to thoroughly clean your driveway before sealing. For the best results, we’d advise cleaning it twice, paying special attention to any joints.

After the first wash wait for the driveway to completely dry, check the joints for any debris and dirt that may be stuck. It may be of use to go over the joints with a wire brush just to be sure that everything is clear. Jet washing again after this process will ensure you’ve cleared any loose dirt, gravel, debris, or other potential contaminants.

Jointing Sand

Now it’s time to make sure the joints are level and neat. Refill the joints with jointing sand or another kiln dried sand. Filling in these gaps makes sure you’ve replaced any sand that was washed away during the cleaning process. Once you’ve filled the gaps you can brush away any excess sand and you’re ready to apply the first coat of sealant.

1st Coat

Before applying the first coat it is important to read the instructions, so you are familiar with the health and safety regulations. The usual advice would include gloves, goggles, and make sure you’re working in a well-ventilated area.

For the best results, you should use a roller to apply the first coat. When rolling the first coat onto the drive, be sure to apply thoroughly between the joints. You’ll want a nice even layer across the surface using around 1-liter per 4m2. It is important not to apply the sealant too liberally as this can disrupt the sealing process.

2nd Coat

Giving the first coating 1-2 hours to dry you can apply the second. For this coat, you should ideally use a DIY pressured sprayer although you can apply again with the roller if you choose. With the first coat dry, spray the second coat on at a right angle to the first coat. This coat can be applied across a bigger area of around 7-8m per 1-liter.

Now you’ve applied both coats you need to leave the driveway untouched for 24-hours so it can completely dry.

Materials List

The tools and material list for the job are as follows:-

  • Jet Washer
  • Sweeping Brush
  • Jointing Sand
  • Sealer
  • Sealer rolling kit
  • DIY Sprayer